Travelogue: Carbone and their legendary Spicy Rigatoni

If you watch Chrissy Teigan’s Snapchat as religiously as I do, you know all about the year’s it-restaurant Carbone. Located in both NYC and Vegas, the restaurant feels straight out of the Sinatra and Godfather era, complete with red velvet draping, bourgie chandeliers, low lights, bow tied waiters, and damn good Italian food. Alex and I were in Vegas last December and obvi I had to check it out.
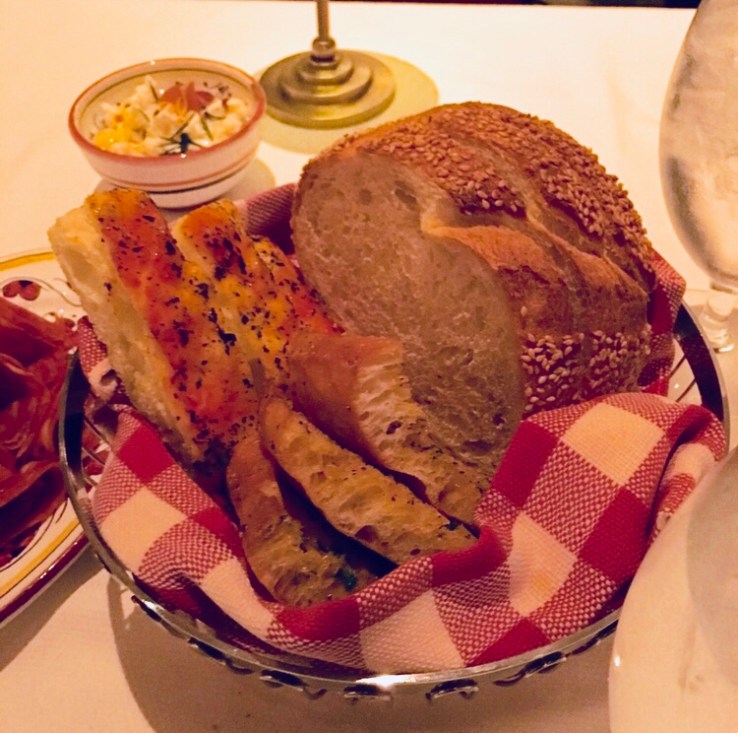
The maitre d’ seated us at a secluded booth, and we had barely put in our drink order before a guy came buy and sliced us a generous hunk of parmigiano-reggiano as an amuse bouche. Any opportunity to eat a hunk of the good stuff should NEVER be passed up. Next they brought our their complimentary antipasti spread. It included cauliflower giardiniera, salami, prosciutto, a couple different kind of cheese, and three kinds of bread. Everything was awesome and went great with the negroni I ordered, but oh man–the tomato bread was our FAVORITE. The waiter ended up bringing us 2 refills of just that. I mean we were probably starved after walking around Vegas all day and guzzling apertifs, but still it was crazy good.

carbone

For the pasta course, we ordered pasta alle Vongole and Carbone’s signature spicy rigatoni alle vodka. The pasta with clams was good, but nothing to write home about…sorry not sorry, I dig my version with sourdough bread crumbs more. But the rigatoni, dayyyymn son!! Alex and I are every last bite and wiped up all the sauce with our bread. For such a humble concept, it was a perfectly executed exquisite dish. More on that in a bit.

As a main course, Alex and I shared the cherry pepper ribs. They were ENORMOUS–like, we both could only eat one rib kind of big–but the meat was fall off the bone tender and glazed in a spicy, sweet, and tangy sauce. It took every ounce of self control I had not to pick the rib up and bite into it like a cavewoman. It was served with a light and lemony side salad that balanced out the rich meat.
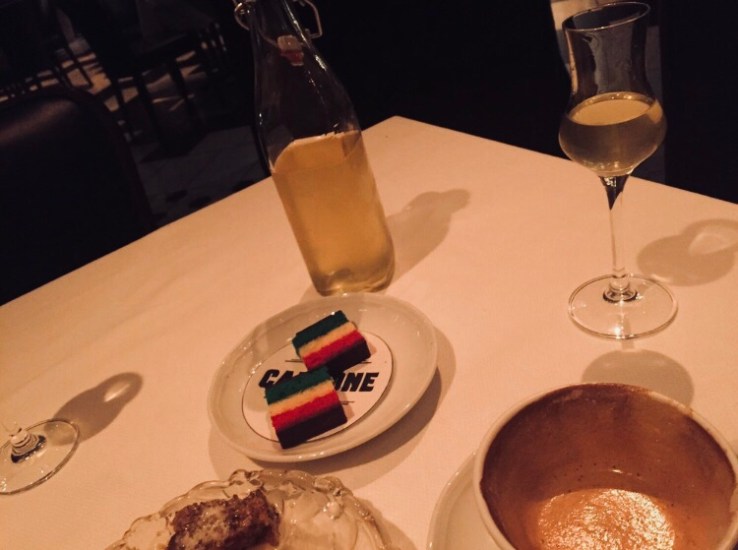
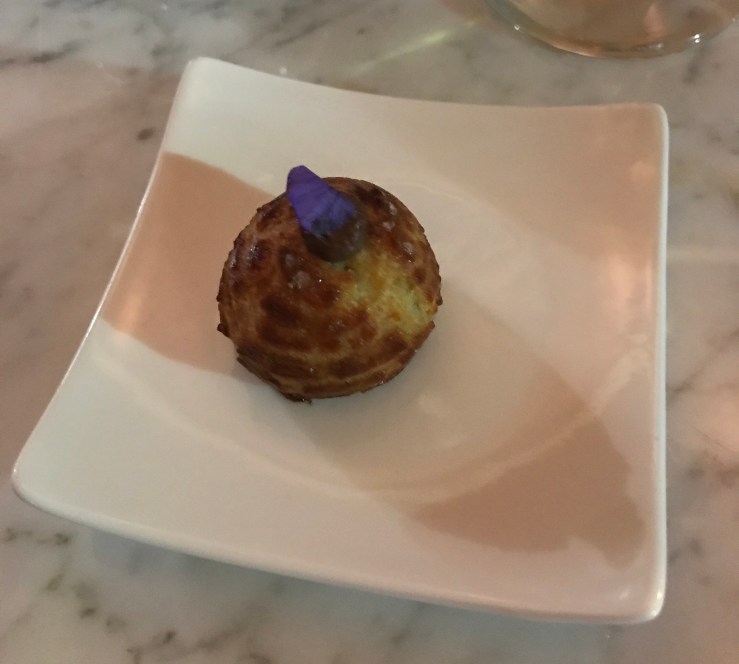
For dessert, they served us complimentary petit fours and an entire bottle of house-made limoncello that Alex and I were too full to even drink one glass of. I thought that was a really cool way to end the meal though, especially if you were on your way to XS or Hakkassan and needed to get a good buzz going. The meal was a splurge, but I felt like we really got our money’s worth with the appetizers, dessert, and last cocktail all baked in. Next time we go back to Vegas, you betcha we’re going back.

But back to dat magical spicy rigatoni. I went right to work replicating this dish, which turned out to be pretty simple. The heat in it is interesting–because of the rich butter and creamy half and half, the spice is a bit delayed and builds as you chow down. Let the simple flavors of tomatoes, crushed red pepper, and aromatics sing and you really can’t go wrong.

Spicy Rigatoni Alla Vodka (Carbone Copy Cat)

You’ll Need

  • 1 lb of rigatoni pasta. The dry stuff from the grocery store is cool, but I’m extra AF and used the freshly made kind I got last week at the Boston Public Market. SO good.
  • A 28 ounce can of whole peeled San Marzano tomatoes. You there, yeah you, pony up for the good stuff.
  • 1 large onion
  • 3 cloves of garlic
  • 1 teaspoon of crushed red pepper. Yep, the kind you sprinkle over pizza. Use half a teaspoon if you’re a wimp.
  • 1 shot of vodka. Ehh, 2 shots so you can drink one while you work. Salud!
  • 3 tablespoons of half and half
  • 1 tablespoon of butter
  • Kosher salt
  • Olive oil
  • Parmigiano or pecorino cheese. Not the shaker. Grate it fresh like the big kid you are.

Method

  1. Peel and dice up your onion. Throw it in a large sauté or sauce pan with a few generous glugs of olive oil. Over medium heat, let the onion cook down for about 4-5 minutes. Add the red pepper flakes and peeled whole garlic cloves, give it a good stir, then let the whole thing cook down for another 4-5 minutes. (So the real Carbone makes supposedly makes their sauce with an onion soubise base, but that requires several extra steps that I find unnecessary for a sauce where onions aren’t the star. Take this shortcut, feel good about it.)
  2. Add the entire can of tomatoes, the shot of vodka, and a couple generous dashes of salt. Vodka…weird right? So what the vodka does is lessen the acidic bite of the tomatoes, making their flavor cleaner, sweeter, and more mild. The butter and cream will have a similar effect to the tomatoes, coming together to make a luscious sexy sauce you’re going to love. (Again, supposedly Carbone doesn’t use vodka in their sauce, but this is a great substitute that mimics the mellow creamy onion soubise step we’re cutting out. Trust!)
  3. Let the sauce simmer on medium-low for 20-30 minutes.
  4. Meanwhile, bring a large pasta pot of water to a rolling boil and add several generous dashes of salt. Cook your pasta to al dente, the shortest recommended time. This leaves a nice bite in your pasta, keeping it tasting fresh and pleasantly chewy. Seriously keep your soft noodles Olive Garden, get that ish away from me stat. Drain those bad boys, reserving a splash (1/4 cup ish) of the starchy pasta water it was cooked in.
  5. Once your sauce has simmered for a good 20-30 minutes, take it off the burner and let it cool for a few minutes. Transfer the sauce to a blender, and add the butter and half and half. Put the lid on the blender, then wrap your hand down with a towel and hold the lid down as you blend your sauce up til it’s smooth. (The hot sauce ups the chance of the lid flying off due to steam build up. Hot tomato sauce all over your kitchen and person = BAD). Taste and add more salt if needed. Splash in a bit of the pasta water if your sauce looks like it needs more liquid.
  6. Toss the pasta in a big bowl with plenty of sauce. Serve in shallow bowls with fresh grated parmigiano and a drizzle of expensive olive oil on top.

Remix The Dish: Add a sliced chicken breast and plop the pasta onto a bed of wilted spinach for a complete meal. The spicy sauce is a great base and would taste awesome on veggies or fish. I bet it’s divine on those fried chicken cutlets from Whole Foods too!

*Some of these pictures are taken from Google. My iPhone pics didn’t turn out awesome in the low lighting. Deal with it bruh.

The one where Chelsea teaches you about sunchokes

2018-05-01_1601

Hi! It’s been a few, I know I know. 12 weeks of work travel, listing and selling, then moving only to move again in 6 weeks will do that to you. It’s been a complicated 2018.

So, sunchokes. “What, that creepy gnarled thing?! I thought that was just weird looking ginger” you may think to yourself. Next time you see a bin of sunchokes (also called Jerusalem artichokes) at Whole Foods or a farmer’s market, trust me and load up on a couple pounds. I know, they look like the things you plant to grow tulips and not remotely edible. But under the thin brown skin lies the sweet and starchy yet surprisingly vegetal meat of this weirdo tuber, and I’m going to teach you how to eat them. They’re easy to deal with, and will impress the heck out of all of your friends. Soigne hand strong.

Sunchokes can be manipulated into a variety of textures, and cooked in almost any way you can think of. A truly psycho like me might get super inspired and make an entire composed dish made up of different preparations of the vegetable, white cloth farm-to-table style. Here’s a quick list of things you can do with sunchokes:

  • Shave them raw into a salad for a clean and crunchy element
  • Boil them until they can be pierced with a knife, then puree them with some half and half, salt, and butter. Satisfying like mashed potatoes, but infinitely more complex.
  • Boil them until they can easily be pierced with a knife, cool slightly, then smash with the back of a pan. Pan fry in butter and olive oil until the skin is crispy.
  • Boil them until they can easily be pieced with a knife (do I sense a pattern here?) then blend in your Vitamix with chicken broth, roasted garlic and onions, and a splash of half and half. Garnish with chopped parsley and a drizzle of you most expensive olive oil.
  • Cut them into chips with a mandolin and deep fry or roast in the oven or air fryer until they’re crispy. They’d taste dope with creme fraiche and caviar…or canned french onion dip on top if that’s more your pace.
  • Chop about a pound in a food processor with the white part of a leek, an egg, some breadcrumbs, garlic, and parsley. Form into patties and chill in the fridge for 30 minutes or so. Pan fry until crispy.
  • Make a hash by shredding sunchokes in a food processor then tossing it in a skillet with some chopped onions. Top with a runny egg and chopped herbs.
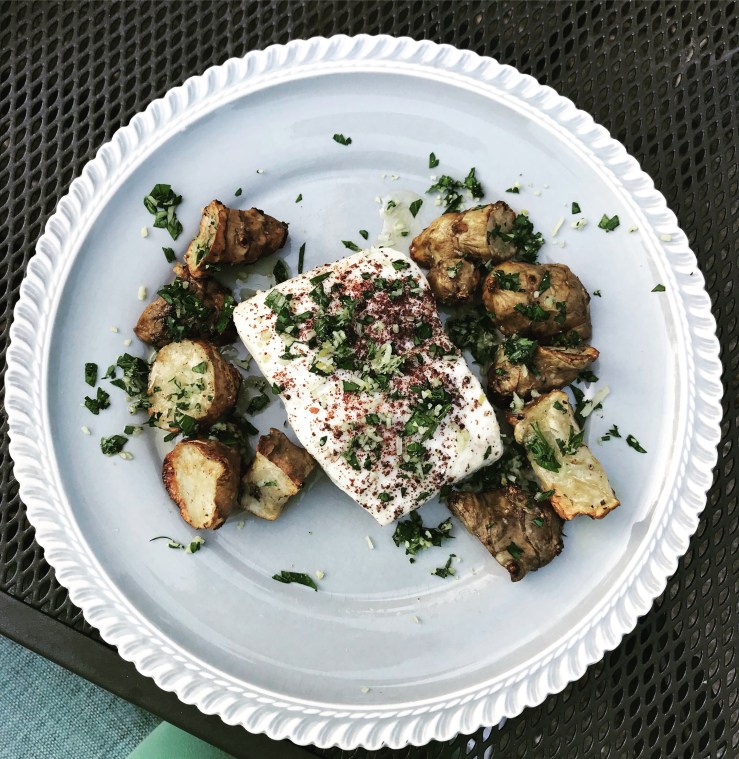
  • Cut into even chunks and roast in the oven or air fryer. This is my favorite preparation, since you get to experience both the creamy flesh and crispy skins that make the sunchoke such a treat. In fact, I’ve got a recipe all ready for you!

Roasted Sunchokes with Classic Gremolata

You’ll Need

  • 2 lbs of sunchokes (or however much you picked up)
  • 1 bunch of flat leaf parsley
  • 1/3 of a cup of grated parmigiana. Not the garbage in a green can.
  • 1 lemon
  • 1 clove of garlic
  • Olive oil
  • Kosher salt
  • Fresh cracked black pepper

Method

  1. Preheat your oven to 425 degrees F (or if you’re living dat air fryer life, retrieve it out of your cabinet and plug that baby in).
  2. Rinse the sunchokes and cut off any dried patches on them. Don’t peel the sunchokes! The skin gives it all its texture. I’m fine with a good rinse under water, but scrub them down with a vegetable brush if that makes you feel better. Cut them in halves or quarters (or leave small ones whole), so they’re all pretty uniform in size–about 1 inch pieces is good.
  3. Toss them in olive oil and a healthy dash of salt. Roast in the oven for 45 minutes or so. When they’re finished, you should be able to pierce through them with a knife, but the texture should be a bit pliable and leathery, if that makes sense. Think of a great roasted carrot–no hard crunchy texture left, but it won’t fall apart the way say, a boiled potato would. Comprende? (Ps, if you’re using an air fryer, roast them at 350 for about 30 minutes, tossing halfway through).
  4. While your sunchokes are roasting, we’ll make the gremolata. Zest your lemon (I know you’re an adult and have a big kid microplane), peel your clove of garlic, grated your parmigiana, chop the bulk of the parsley stems off and discard. From here you can toss the garlic, lemon zest, cheese, and parsley into a food processor and pulse until its minced and all incorporated together. It should look like delicious green confetti, not saucy like a pesto. My food processor is packed up in storage for the next 6 weeks, so lucky me gets to mince everything with a knife.
  5. Serve your sunchokes with the gremolata sprinkled on top. I’m serving this on the side of some simple oven roasted halibut. Cheffy AF with minimal effort. You go Glen Coco!

Remix The Dish: You can follow this exact recipe with baby potatoes or fingerlings–just be sure to roast them long enough! The gremolata would taste delicious over steak, chicken, fish, or any other roasted vegetables. Another good play on this would be to toss the roasted sunchokes with olive tapenade, orange zest, and chopped parsley, or straight up jarred pesto if you don’t want to work that hard.

Why yes, I did have to make Alex an entirely different meal. He tasted a sunchoke though, I’ll give him that.

The one where we make Lobster Rolls

Everyone knows the best week in Tulsa is lobster roll week at Trencher’s. The 40 person line and curt man who used to work at the register are well worth that first bite: warm bread that’s both crispy and delightfully soft; the smell of fresh lobster hits your nose at the same time the sweet salinity hits your tongue; mayo so light you don’t even know it’s there. Perfect lobster rolls in Oklahoma–they can be done!

So I know I know, lobster isn’t exactly a budget friendly item. No shame in po’ boying it with shrimp or the frozen langoustines you can buy at Trader Joe’s. My bourgie ass has just GOTSTA splurge every now and then though.

Now, I’m not a mayo person. But the mayo is crucial in this recipe–trust me, it keeps the lobster light and succulent. It holds the salad together and keeps it from getting watery and gross. The salad won’t be creamy at all–just fresh!

Believe it or not, I nabbed this recipe from a restaurant in Minneapolis (!!) called the Smack Shack. I ate there for dinner one night and loved it, then was thrilled to see the place again at the airport. It was 9:30 am and I got a lobster roll anyway. Foodie for lyfe.

You’ll Need:

  • 2 live Maine lobsters
  • JK! You think I have the stomach for throwing breathing living things into a pot of boiling water while they scream in agony? Fuck that. Also, de-shelling is just not my forte.
  • Okay for real now. About 1-1.5 lbs of frozen lobster meat, thawed. THE GOOD STUFF. The kind of stuff you have to get from Bodean’s or an actual fish monger. I wouldn’t trust anything from Target or Sam’s.
  • A clamshell of tarragon
  • A cucumber
  • Mayonnaise. Don’t even THINK about using Miracle Whip, it’s disgusting. Don’t try to save calories by using Greek yogurt either, the taste is way too strong and is an unforgivable sin against that delicate and delicious lobster meat.
  • Kosher salt and fresh cracked black pepper
  • Butter lettuce or arugula
  • Oil spray or softened butter
  • Brioche buns. Or milk bread if you know where to find any.
  • Lemon, for garnish

Method

  1. Preheat your oven to 400 degrees Fahrenheit. Split your buns down the top and gently pry them open a bit…you want that surface area, baybee! Spritz with oil or slather with some softened butter.
  2. Take your thawed lobster meat and let it drain in a colander. You want the meat to be dry-ish before mixing it with the other ingredients.
  3. While the oven is heating and lobster is draining, peel and de-seed your cucumber, the finely dice about half of a cup. Gently pull about half of the tarragon from their stems and chop up those leaves too.
  4. Take a paper towel and gently press down on the lobster, absorbing the last bit of excess moisture. Dump onto a cutting board and give it a quick chop, breaking up any large pieces but still leaving lots of texture. Toss in a bowl with the cucumber, tarragon, and 1/4 cup of mayo. Taste, then add salt and pepper to your liking. Set aside in the fridge to let the flavors meld.
  5. Toast your brioche buns in the oven for 7-8 minutes, until they’re golden, crisp on the surface but soft underneath.
  6. To assemble, gently open the buns and add a thin layer of butter lettuce or arugula. Top with a generous serving of the lobster salad. Squeeze a little lemon on top. Try not to cram the whole thing into your mouth at once.

Remix The Dish: The lobster salad will taste just as awesome the next day after the tarragon really sets in. I’m extra AF and plan on eating it in butter lettuce wraps for lunch the next couple days at work! For a more traditional take, use parsley and celery instead of tarragon and cucumbers.

Mushroom Steel Cut Oat Risotto

This is a dish I’ve had in the back of my mind for years now. I’d read that you could treat some starches other than arborio rice just like you would a risotto–farro, barley, even brunoised (finely diced) potatoes. Alex and I were staying at a hotel in Cancun called Live Aqua, where Michelle Bernstein has a restaurant and featured a savory steel cut oat risotto. I tried it for the first time and loved it. It was rich and cheesy, perfectly paired with melt in your mouth osso bucco and bright pickled fennel.

Last month I went to Empire State South while in Atlanta on a business trip, and Hugh Acheson’s rendition of steel cut oat risotto was truly something special. The umami-rich mushrooms contrasted with bright green basil oil, and an acidic element added depth and tied the whole thing together. This is my attempt to recreate that magic.

You’ll Need

  • 1 container of mushrooms–baby bellas, shiitakes, or something fancier if you have access to them
  • 1 clamshell of dried porcini mushrooms–about 1/3 of a cup
  • 3/4 a cup of steel cut oats
  • 1/2 a cup of white wine
  • Granulated garlic
  • 1/2 a cup of fresh grated good parmiggiano, plus more for garnishing
  • A palmful of chopped tarragon
  • Tarragon, balsamic, or red wine vinegar
  • Olive oil
  • Kosher salt
  • Chives for garnish

Method

  1. Start by boiling 3 cups of water, then add the dried porcinis. This will steep and produce a very dark, umami-rich liquid. This will be the flavor base of the dish. Trust.
  2. Preheat the oven to 400 degrees F. Rinse the mushrooms really well in a colander, toss with a pinch of salt and a drizzle of olive oil, then roast on a sheet pan for about 35-40 minutes, tossing halfway through and checking to make sure the mushrooms don’t dry up too much. The mushrooms should release a lot of their liquid and concentrate in flavor. They’ll taste awesome. Remove and let cool slightly. We’ll use these to top the risotto at the end, so if you want to do this a day in advance, that’s totally cool. I run a very laissez-faire kitchen up in here.
  3. While your mushrooms are roasting, do your prep work–chop your herbs, grate your parmiggiano, measure out your wine, get all of your ingredients out where you can easily access them. Once the cooking process starts, you won’t be able to leave your station for too long. Nuke the porcini mushroom liquid for 2 minutes so it’ll be warm and ready to go.
  4. To start the risotto, get a large flat-bottomed pan (a sauté pan or frying pan that’s a couple inches deep will work well). Drizzle in some olive oil, and heat over medium. Once warm, pour in the steel cut oats and let them toast. Stir the oats constantly and don’t let them burn–this step is over once you can smell their nuttiness, about 30 seconds later. Pour in the white wine and give it a good stir, then turn the heat down to medium low. Add a couple big pinches of salt and a generous pinch of granulated garlic. Stir with a wooden spoon every 15 seconds or so, and let the oats absorb the liquid.
  5. For the next 25 minutes or so, this is your job: splash in 1/4-1/2 a cup of porcini broth into the oats, and stir and stir until the oats absorb much of the liquid. Once the liquid mostly dries up, add some more. Your oats should always be veiled under a thin layer of liquid, and you should stir it constantly to make sure everything cooks evenly, doesn’t burn, and that the excess starches get creamy and delicious. It’s a labor of love, but you’ll be so glad you put in the hustle.
  6. Once all the broth is used up, taste the oats. They should be hearty and toothsome, but not unpleasantly hard. Add warm water and continue cooking if it needs more time. If not, cut the heat and stir in the parmiggiano, tarragon, and a splash of the vinegar. Taste, then add more salt if needed.
  7. To serve, spoon into a wide bowl. Top with the roasted mushrooms, the chives, fresh grated parmiggiano, and a drizzle of good olive oil. Try not to wolf it down too quickly.

Remix The Dish: You can use this same method with chicken, beef, or veggie broth if mushrooms aren’t your thing and still get a crazy delicious meal. Chicken broth topped with roasted asparagus and bright green basil oil with be a super sexy spring dish. Next time, I’m going to double this recipe and eat the leftovers for breakfast with a 7 minute egg.

Let’s Talk About Shishitos, Baby

The first time I ever even heard of shishito peppers was in Austin. My friend Kyle ordered them for the table, and told us that they were a mild pepper, but 1 in 10 is wicked spicy. “Appetizer roulette, how fun!” I thought. The peppers were grassy with a hint of sweetness, and came with a aioli sauce that added some zest. Boom, love at first bite. I immediately ordered another round.

Shishito peppers have become my signature dish. Rarely will you visit my house without a platter of fresh pan-blistered peppers on my kitchen island. I make a point to order them every time I see them on a menu, and love seeing different chefs’ takes on the simple pepper. This is version I’ve been super into lately–I’ll share some variations on it as well!

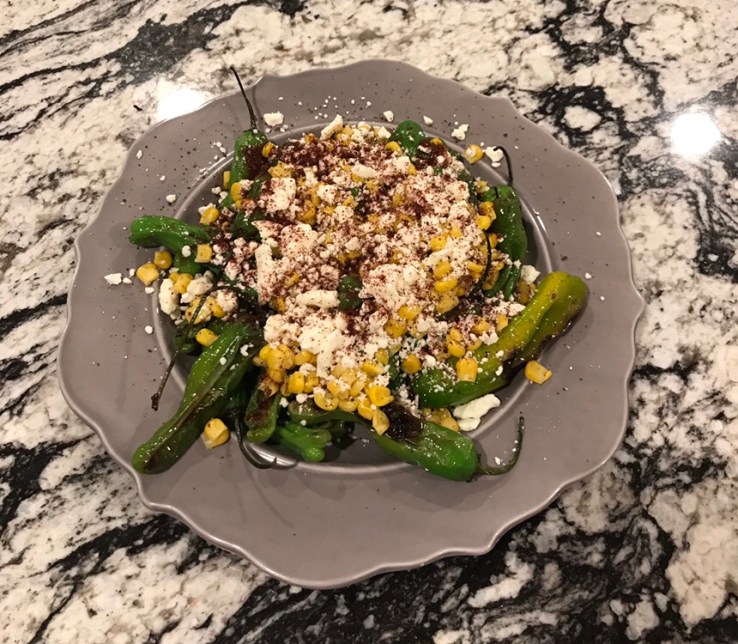
Pan-Blistered Shishito Peppers with Roasted Corn, Feta, and Sumac

You’ll Need

  • A bag of shishito peppers. I’ve found them at Sprouts, Trader Joe’s, and Whole Foods, but no luck at Reasor’s or Target. WARNING: be sure you’re buying SHISHITO peppers. Not serranos. You will deeply regret making this recipe with serrano peppers.
  • Fresh corn kernels cut from one cob, or 1/2 a cup of thawed frozen corn
  • 1/4 a cup of Feta cheese
  • Sumac (if you don’t have any, lemon pepper seasoning is a good substitute)
  • Olive oil
  • Kosher salt

Method

  1. Let a large cast iron skillet heat over medium heat for 10 minutes. If you don’t have one, use the biggest frying pan you have, but while you’re waiting on it to heat up, get on Amazon and buy yourself a cast iron skillet you friggin man child.
  2. While the pan’s heating up, toss the shishitos and corn with a couple good glugs of olive oil and a dash of kosher salt. Dump the veggies in you pan at let it sizzle and blister in the pan for 2-3 minutes.
  3. Use a spatula to give the veggies a good toss. Let the veggies blister for another 2-3 minutes, then toss the veg around and let it cook for another minute or so. You want the corn to be heated through, and charred spots on the peppers. The peppers should still be bright green, slightly softened by still retain their shape.
  4. Remove from the pan and arrange on a platter. Sprinkle with the feta cheese and generously finish with the sumac. Sumac is a bright, lemony, and fruity, the PERFECT addition to these flavor profiles. Dig in and remember to share.

Remix the Dish

  • Blister shishitos with olive oil and kosher salt, then serve with your favorite dipping sauce. Green goddess, parmesan vinaigrette, creamy Dijon, or wasabi aioli would all be bomb.
  • For an Asian take, blister shishitos in olive oil with granulated garlic,’ginger powder, and kosher salt. Finish with a drizzle of soy sauce, sesame oil, and sesame seeds or furikake.
  • Stephanie Izard broils her shishitos in the oven with miso paste (thin it out with water first), good parmesan, sesame seeds, and bread crumbs. A totally bizarre combo, but tastes AMAZING.
  • Make a salsa/relish out of shishitos by chopping pan blistered peppers and tossing with olive oil, red wine vinegar, salt and pepper. Amazing with steak, chicken, eggs, anything! Also, a great way to repurpose leftover peppers.

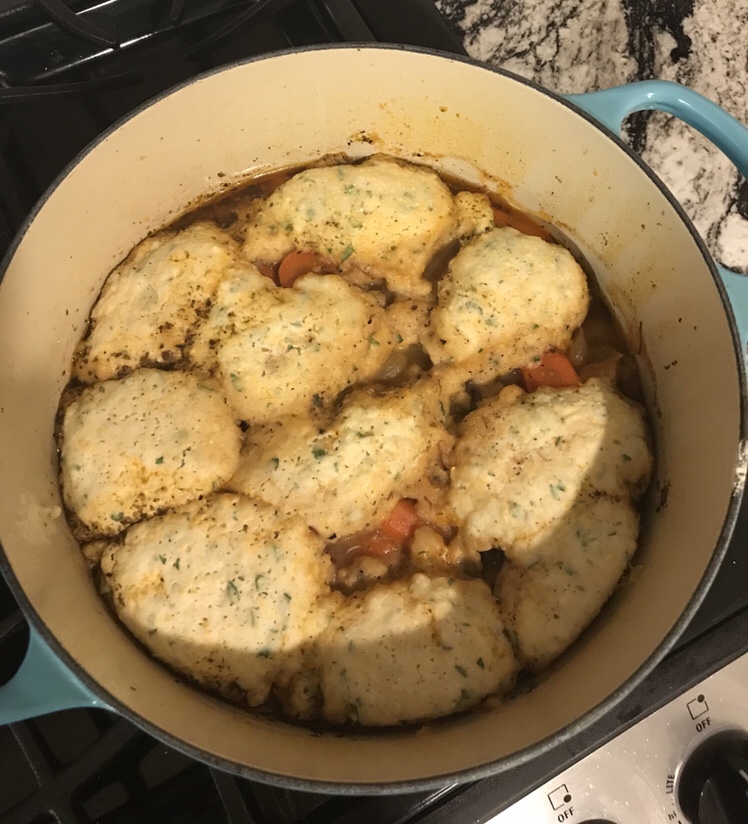
Guinness Beef Stew with Parmesan Dumplings

Despite the ridiculously warm weather, I’ve been in the mood for rich comforting winter foods. Having only tried dumplings at Cracker Barrel, I thought I wasn’t a fan–those dense, doughy masses just weren’t my jam. It’s only been about 5 years since I learned about the fluffy, cloud-like biscuit dumplings I’d been missing out on my whole life. Obvi, I have a LOT of stolen time to make up for.

Jamie Oliver gave me the idea to combine rich Guinness with the acidic and savory taste of Parmesan. I got the dumpling methodology from none other than the Pioneer Woman–adding cornmeal to keep the dumplings light and un-gluey is truly a stroke of genius.

You’ll Need:

  • 1 styrofoam package of stew meat (or skip step 1 and use leftover pot roast or brisket)
  • 2 tablespoons of flour (don’t do this is you’re using leftovers)
  • 1 cup of thawed frozen pearl onions (or one large onion, diced
  • 3 carrots, peeled and cut into 1 inch oblong pieces
  • 1 1/2 cups of pee wee potatoes or baby potatoes, halved
  • 1 bottle of Guinness or another stout beer or a porter
  • 3 cups of beef stock
  • 1 tablespoon of tomato paste
  • 1 tablespoon of soy sauce (trust)
  • 1/2 a teaspoon of garlic powder (or 2 cloves, minced)
  • 1 teaspoon of dried oregano
  • Kosher salt
  • Pepper
  • 3/4 cup of all purpose flour
  • 1/4 cup of cornmeal
  • 1/3 cup of grated or shredded Parmesan (not the gross stuff out of a green shaker)
  • 1/2 heaping tablespoon of baking powder
  • 3/4 cup of half and half
  • Kosher salt
  • Oil
  • Chopped parsley

Method

  1. Toss the stew meat with the flour and a few big dashes of kosher salt. Heat a couple tablespoons of oil in a large heavy-bottomed pot or dutch oven over medium heat. Place half the meat (discard the excess flour and salt) and let it sear for a minute or two before flipping over to sear on the other side. Use a slotted spoon to remove the meat and seat aside on a plate. Repeat with the remaining meat. The pot is going to have all kinds of browned bits stuck to its bottom. This is good, VERY GOOD. Do not wash the pan before the next step. Trust!
  2. Add the onions and carrots to the pot and let the veggies sauté for 5-6 minutes. The onions should be soft and the carrots should have a little color. Now we gon’ get fancy AF and do a little something they call DEGLAZING. To deglaze, you pour flavorful liquid into a pan and use a wooden spoon or a whisk to scrape up all the brown bits from the bottom of the pan, letting them dissolve into the liquid. This is where SO MUCH of your flavor comes from–it’s how people make delicious things like pan sauces. So go ahead and pour your whole bottle of Guinness into your pot and scrape away!
  3. Add beef stock, tomato paste, soy sauce, garlic, and oregano, whisking so it all comes together. Add the meat and any accumulated juices back in the pot, then stir in the potatoes, a few dashes of kosher salt, and 10-15 cranks of fresh ground pepper. Bring to a boil, then reduce to low heat. Cover and let simmer for about 35 minutes.
  4. While the stew is stewing, whisk the flour, cornmeal, a dash of kosher salt, parmesan, and the baking powder together. Stir in the half and half until it’s incorporated into a wet dough.
  5. Once the 35 minutes are up, open the lid a tad and taste the potatoes and meat to make sure they’re both cooked through and tender. Taste the broth too, and add salt or more pepper if needed. Remove the lid and use a tablespoon to quickly dollop big blobs of the dumpling dough directly on top of the stew. They’ll sink a bit, and it’ll look messy and gross and you’ll want to freak out on me for ruining a pot of perfectly good pot of food. Don’t. Trust ya girl, k?! Put the lid 90% of the way back on, and let it simmer on low for 15 minutes.
  6. Take the lid off. Holy shit, those gross blobs of wet dough have turned into delicious puffy white clouds!!! Let the stew sit for about 10 minutes so the dumplings can cool off a bit and set before serving. The stew will have thickened into a savory gravy that coats the meat and veggies and is a match made in heaven with the soft and bread-y dumplings. This really is the ultimate comfort food. Garnish with the parsley and Instagram that ish.

Remix The Dish: Believe it or not, these dumpling hold up surprisingly well as leftovers! Miraculously, they don’t get overly soggy or anything for the first couple days. As mentioned before, this is one of my favorite ways to repurpose leftover pot roast. This dish tastes AMAZING with chicken too–swap out a shredded roto chicken for the beef, the beer for a cup of apple juice, beef stock for chicken stock, and instead of soy sauce, stir in 1/2 a teaspoon of turmeric.

Bite Night with Top Chefs in Dallas!

So, last week I got to do something super cool. The cheftestants from last season of Top Chef got together to do a fundraiser in Dallas and all made little dishes highlighting Texas produce and livestock. Located at a beautiful outdoor farmer’s market, “Bite Night” felt exactly like the competitions featured on Top Chef…well, without Tom, Padma, Gail, and all the pressure. Last season was as close to an “All Star” season as we’ve had in several years, so my and my BFF (best food friend) Kyle were more than willing to make the drive to D-town and join our friends Tori and Matt for the occasion.

Apologies for not taking more pictures of the food. Turns out holding a drink, a food tray, feeding yourself, and holding a phone to take a pic all at the same time is kinda difficult.

The four of us couldn’t stop raving about how perfect the event was. Before big gatherings like this, I always worry about long lines for food, excessive heat, substandard alcohol options, obnoxious people etc. Instead, we were greeted with an airy outdoor venue, buzzing but not too packed, with enough food and drink offerings scattered about that no line took more than a few minutes. After a few Deep Ellum brews (because that’s a must while in Dallas), we sipped on absinthe cocktails (seriously!) and a delicious St Germain and prosecco spritzer that was so tasty I bought a bottle of the elderflower liquer the next day. But you know we didn’t come for the drinks….we came to all geek out over our favorite TC contestants and finally get to taste their food!
The chefs all know these events are basically all just a big PR/marketing job, so for the most part everyone was really charming and acted flattered when asked to take photos. I appreciated that they were so willing to answer questions, talk about the food, laugh about the show, and seemed to enjoy interacting with their fans. I imagine it’s hard to stay “on” like that, but it really did make the night super memorable.
I didn’t take great notes, but several chefs and their dishes stand out in my mind. Our first stop was at Sheldon Simeon’s booth, because OF COURSE. He made some sort of cornmeal crusted chicken wing with a peanut sauce, lime and cilantro. You really can’t go wrong with those kind of flavors and textures–total crowd pleasers. That being said, you could tell each element was put together by a professional and it was absolutely delicious. We told him about our Top Chef draft and seemed amused when we told him he was the number one pick. Then he apologized to Kyle for losing it for him which was pretty funny.
Shirley Chung made a crazy-tender beef cheek, and had her husband with her to help plate the food. It was really cook watching them work together–they’re in the process of opening a totally self-financed fast casual restaurant in California, and Shirley’s husband runs all the business aspects of the operation. Brooke Williamson made a charred skirt steak over a brioche sauce and a watercress salad on top. It blew my mind that they could put food out like that with just a plancha and a hot plate to work with!
John Tesar, the host chef for the event, made a lobster and crab toast with some kind of tasty orange thing crumbled on top–pretty sure it was lobster coral, which I’ve read about in one of Thomas Keller’s cookbooks but had never seen or tasted before. Katsuji made a amazing poached shrimp on a rice cracked with some sort of acidic and peppery sauce and topped it with a giant piece of uni! I told him that we named out cat after him, and now call Scout and Barkley “Scoutsuji” and “Barksuji” in his honor. He told me to tag all of them on instagram so his wife would believe the story, haha!
We didn’t get to see much of Gerald Sombright on the show, but his filet mignon with “billionaire potatoes” was definitely something to write home about. It was basically a hollowed-out crispy fingerling potato boat filled with caviar. I couldn’t stop staring at his station because I’ve never seen that much caviar in a container before in my entire life–the good tapioca sized caviar, not the tiny roe specks you get at sushi restaurants.
Speaking of luxury products in bulk, just that morning I watched the Instagram story of Alinea’s chef de cuisine and marveled at how their fresh uni arrives packed into a book-sized wooden cigar box. Six hours later at Bite Night, both Katsuji and BJ Smith had those exact same boxes of uni at their stations. BJ made a fresh potato chip with bison tartare and a fat piece of uni right on top. Kyle and I went back for three helpings. You never can eat enough uni.
Seriously. I could eat uni every day, and I’m pretty sure Kyle could too.
Getting to talk with Casey Thompson was a big highlight of the night for me. The deep fryer at her station took awhile to heat, so she kinda bounced around with the crowd and talked to me, Kyle, and Tori for a solid ten minutes. She’s just as stunning in person as she is on TV, and has a genuine warmness about her–she reminded me of Tammi Taylor from Friday Night Lights! She made a fried chicken liver and chicken skin slider. Ah, the two BEST parts of a bird.
Silvia made a delicious bolognese sauces with handmade cavatelli and roasted bone marrow, Emily Hahn made a beef empanada with pumpkin sauce, and Annie made a steak and beet tartare. Jamie Lynch’s sousvide strip steak with smoked mashed potatoes was moist and perfect, it was really fun getting to tell him that he was my pick in the draft.

It was awesome getting to taste so many of my culinary heroes’ food, but even cooler getting to meet so many in person. I know a lot of people don’t understand food as a hobby, but I see it as a way to engage with the world around you. Visiting a city for work or pleasure is that much more special when you get to eat at the home restaurant of a chef that you follow. Inserting creativity and expression into something you have to do daily turns a chore into something you can look forward to. I know it’s not for everyone, but I’m glad to have a hobby that’s such an easy point of connection with the community around me.

Pasta alle Vongole (Linguini with Clams)


I’m reading this book called Salt Acid Fat Heat right now and holy hell…if you have any interest in ever getting “off the book” and acquiring the ability to invent recipes on your own, this a great place to start. It teaches that cooking is all about mastering four key elements–salt, acid, fat, and heat–and shows how great dishes all stem from controlling those factors.

Throughout the book, the author Samin Nosrat refers to common dishes over and over to illustrate how these four key elements play off each other to create familiar flavor profiles we all love. Peanut butter and jelly, grilled cheese and tomato soup, and wedge salads are all frequently mentioned along with Pasta alle Vongole, a bright umami-rich pasta dish that’s really pretty simple considering its “wow” factor. I made this a few days ago and I’m still dreaming of that fresh perfect bowl.

The layers of wine, clam juice, lemon juice, and a hint of good cheese create a briny dish that’s elegantly balanced by bright acidity. The crushed red pepper adds depth, and parsley adds freshness. Don’t skip the sourdough breadcrumbs–they provide a textural element, as well as an extra tangy note. Plus they end up soaking up the sauce and tasting delicious, which ya know you don’t want to miss out on.

Adapted from Samin Nosrat. Serves 2 hungry people, with leftovers.

You’ll Need

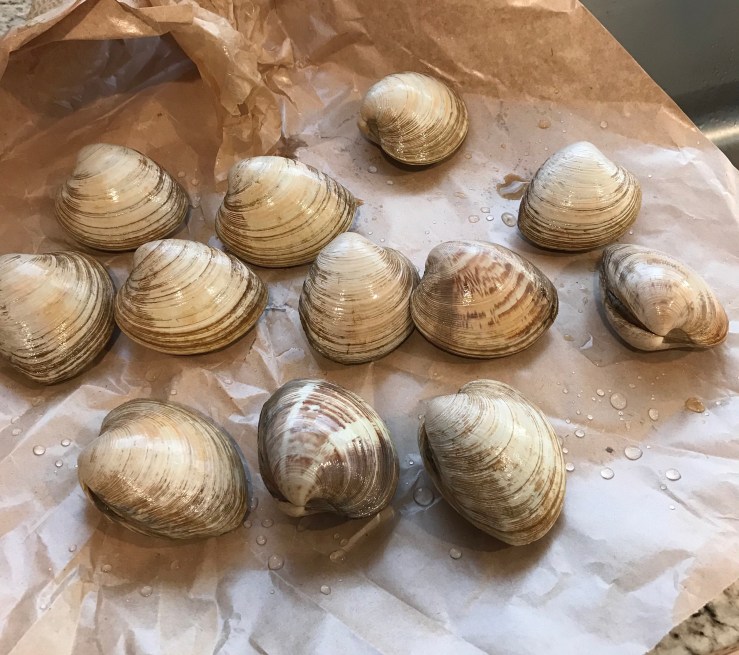
  • 12 large or 24 small clams. Buy them the day you plan on using them!
  • 3/4 cup of white wine
  • 3 cloves of garlic, minced
  • 1 bunch of parsley, minced
  • A small palmful of crushed red pepper flakes
  • Juice of 1/2 a large or one small lemon
  • 2 tablespoons of butter
  • 1/4 cup of really good parmegiano or pecorino. Fresh stuff, not the garbage in the green shaker.
  • 1/2 a package of linguini
  • 2-3 slices of sourdough bread, toasted til brown and smashed to crumbs
  • Olive oil
  • Kosher salt

Method

  1.  First thang first, get a large pot of generously salted pasta water on the boil. The most difficult part of this dish is juggling the time, so you want to make when you drop your pasta in to cook a non-issue. Do your other prep work now too–mince your parsley and garlic, toasts and smash your breadcrumbs, get the butter, cheese, and red pepper flakes out and ready to go.
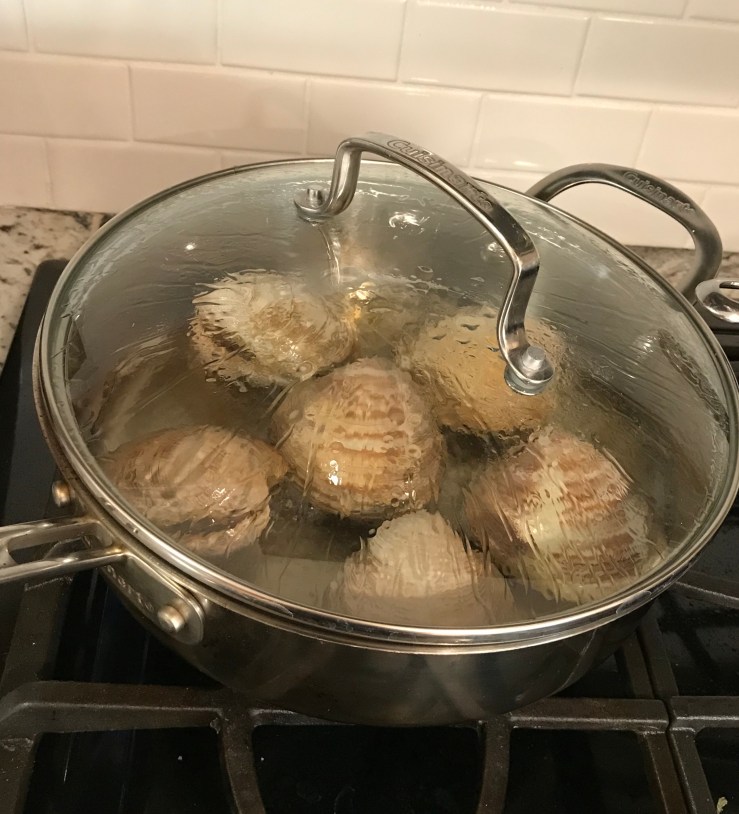
  2. Gently scrub the clams with a vegetable brush under cold water and rinse thoroughly. In a large saute pan, bring the white wine up to a boil, then reduce to medium high heat. Gently lay half the clams in the wine, cover the pan, and let the clams steam until they open, about 3-4 minutes. Remove the clams, letting the clam juice drain back into the pan for each one, and set in a bowl to cool down. Discard any clams that don’t open within 6 minutes. Repeat with the other half of the clams. The leftover steaming liquid is the entire crux of this recipe…if it has a greenish or blueish tint, don’t freak out, its cool. Pour all of the leftover liquid from the saute pan into a large bowl and set aside. It’s going to be the base of our sauce.
  3. If you’re using large clams, let them cool for a few minutes then gently remove them from their shells and slice into three or four pieces. Clams are one of those things that you really just want a small ladybite of. Discard the shells but keep the accumulated juices in the bowl. Add the clam meat back to the bowl and set aside. NOTE: you can skip this step if you’re using small clams.
  4. Alright, things are about to heat up. Drop your pasta in the boiling water and let it cook for 2 minutes less than the al dente time recommendation. My package said 8 minutes, so I cooked it for 6. Before you drain your pasta, use a ladle or carefully pour about a cup of the starch-rich pasta water to a coffee mug or measuring cup. This step is important, don’t mess it up.
  5. While your pasta is cooking, heat a couple tablespoons of olive oil, the crushed red pepper, and the minced garlic to your saute pan over medium low heat and let it bubble and infuse for 3-4 minutes. Keep a close eye on this! Don’t let the garlic brown. Your house should smell awesome right now. Add the wine/clam steaming liquid broth back into your sautee pan and crank the heat to high.
  6. Once the broth starts to bubble, add the par-cooked pasta and turn the heat down to medium while gently tossing the pasta. Add a splash of the pasta water and the butter, and let the whole thing cook down for about 2 minutes. The pasta will absorb the delicious broth while simultaneously thickening it into a light sauce, that should surround every noodle equally. If the pasta looks dry, add a bit more pasta water and let it continue to do its thang. The noodles should look very slippery and well lubricated, but not drowning in broth.
  7. Take the pan off the heat. Add the lemon juice, cheese, parsley, and clam pieces/any accumulated juices, and toss until its all well distributed. Taste and add salt if its needed—but between the salted pasta water, the clam broth, and the cheese, you should probably be good. Serve with a generous handful of breadcrumbs and a drizzle of olive oil.

Remix The Dish: If you’re cooking for a picky eater, portion out their pasta before you mix the clam pieces back in the pasta. Believe it or not, the tangy and umami-rich pasta tastes A LOT like a Caesar salad, and pairs well with chicken as its protein instead. My husband HATES seafood but ate his entire bowl with chicken on top. You could also make this dish with mussels–add a pinch of saffron to the steaming broth, and stir in fresh dices tomatoes with the butter and cheese.


Sausage and Peppers with Rice Grits


IT’S FINALLY COLD OUTSIDE. Hearty comforting foods are my favorite to both cook and eat, and the time is right for them. This New England meets New Orleans dish is wildly simple yet develops a ton of flavor within a short period of time. Basically, it’s the perfect weeknight meal.

I came up with it on the fly one evening, but next time I plan on doing all the prep work in the morning (steps 1 and 2) then finishing it up at dinner time. The onions and peppers cook down into a sweet jammy kind of relish that perfectly compliments the smokey and savory sausage. I added shrimp for me and leftover chicken for Alex to boost the nutritional value of the meal because we’re workout fiends, but that’s totally optional.

I was first introduced to rice grits at Tom Colicchio’s Craft Bar in NYC a few months ago, and they’ve quickly become a pantry staple. They cook up way faster than regular rice or corn grits, but offer the same starchy base perfect for absorbing flavors and filling your belly. You can buy them on Amazon, but since they’re expensive I opt to grind the rice myself at home. This way I have an endless supply.

You’ll Need:

For the Sausage and Peppers:

  • 1 package of kielbasa (one really long link is how they come at my grocery store)
  • 2 small or 1 large onion
  • 1 large red bell pepper
  • 1 large yellow bell pepper
  • Kosher Salt
  • Olive Oil
  • Optional: Fresh or thawed shelled and de-veined shrimp (I use Trader Joe’s Argentinian Red Shrimp, high quality and they always smell super fresh). You could also add in leftover or rotisserie chicken if you’re feeling it.
  • Optional: Green onions or parsley for garnish

For the Rice Grits:

  • 2 cups of dry jasmine rice
  • 1 tablespoon of butter
  • Kosher Salt

Method:

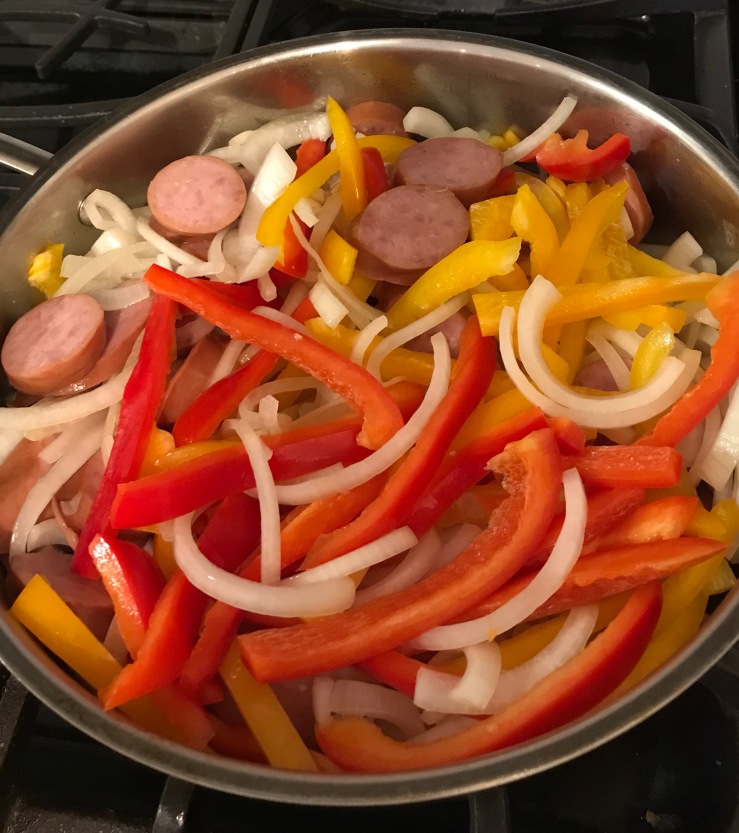
  1. We’ll start with the prep work. Lop off both ends of the onion and slice in half from top to bottom. Peel off the skin and turn each half on their side, then slice into thin half moons. For the bell peppers, carefully insert your knife on the top of the pepper and cut a circle around the stem, close to the edge of the bell pepper. Remove the stem and seeds, then cut the peppers in half from top to bottom. From there, remove the white pith with a paring knife and any rogue seeds, then slice longways so you have long strips, like you’re going to make fajitas. For the Kielbasa, remove it from the packaging and slice them into thin oblong pieces. If you’re doing your prep work in the morning, toss the veggies and meat in two separate ziploc bags and throw them in the fridge til you’re read to cook.
  2. For the rice grits, put the uncooked jasmine rice into a freezer bag and squeeze all the excess air out. Spread it in a thin layer across the bag, then put in in the freezer for 30 minutes. This step makes the rice brittle, and is crucial to get the rice to break up in smaller bits. Remove the rice from the freezer and pour into a food processor. Cover the top (seriously, unless you want white powder all over your kitchen) and process on high for about 4-5 minutes, stopping every minute or so to check out the size of the granules. You want the rice to look like it’s been broken into halves or thirds, NOT completely pulverized. Store in Mason jar until you’re ready to use the rice. It’ll keep forever in the pantry, just be sure to store it in a jar or a plastic sealed container to keep out pantry flies.
  3. Put the largest skillet you have over medium heat with about a tablespoon of olive oil, and add the onions and sausage. Let it all brown and cook down for about 5 minutes before you add the bell peppers and a pinch of kosher salt. Turn the heat down to medium low, and let the whole thing cook down for about 30-35 minutes, stirring every 5 minutes to make sure everything is cooked evenly. The veg will melt into a sweet jammy relish, it’s the best part! But I suppose if you like your veggies to have more body to them, you can take it off the heat after 20 minutes or so. This is a pretty laissez-faire kind of cooking blog. In the last 10 minute of cooking, add in the shrimp, stirring every few minutes to make sure they’re cooked through. If you’re using cooked leftover or rotisserie chicken, add it in the last few minutes to heat it through.
  4. Meanwhile, measure out a cup of the rice grits and pour it into a sieve. Run it under water, swishing it around with your hands to remove all the powdery white starches. This step is important! Too much leftover pulverized rice will make your grits overly gummy. Save the rest of the rice grits for next time.
  5. Bring the rice grits and 2 cups of water to a boil. It’ll happen sooner than you think, so ya know, hang out by the stove. Stir and turn down to low, and stir in about 1/8-1/4 of a cup of water every time the rice absorbs all the water (so probably every few minutes). Cook for about 15 minute, or until the rice grits are soft to taste with no hard center. Remove from the heat, and fold in the butter and a pinch of salt.
  6. To serve, lay a bed of rice grits in a plate or a bowl. Spoon the delicious sausage and peppers on top. Garnish with green onions or parsley.

Remix The Dish: Use the leftover sausage and peppers on a sandwich, on top of scrambled eggs or mixed with potatoes and fried like a hash. The rice grits remind me of congee, a traditional rice porridge, so I like to eat it how my mom would for breakfast with a fried egg, soy sauce, chili oil, and some fresh green onions. It would taste bomb with anything stew-y and rich though, like pot roast, short ribs, or pretty much anything made in the crock pot.


Travelogue: Maison208 in Philadelphia


Real Talk: I visited this place 2 months ago, and have been so slammed I’m just now getting around to writing this. I didn’t take many notes, but it was such a special night, everything’s still seared in my memory.

You don’t have to know me long to know that I’m obsessed with Top Chef. I tweet about it frequently, have a fantasy draft with my husband and our best friend, and all the old seasons are on continuous loop in my house. I’ve taken great pride in the fact that I can list out all cheftestant superlatives at the drop of a hat: the funniest (Fabio and Stefan), the most overrated (Marcel, Hosea, and the jerkface who won New Orleans), the ones who could have won a different season (Dale Talde, Antonia, Greg Gourdet, Jen Carroll), the sexiest (Sam, Casey, Tre), and the ones you’d most want to be best friends with (Sam, Casey, Tre). It should come as no surprise that when I travel, I love to hit up restaurants from Top Chef alumni and judges. While in Philadelphia last July I got to visit Maison208, the brand new restaurant from Sylva Senat.

From the first 10 minutes of last season’s Top Chef, I knew Sylva was going to be a heavy hitter. The way he butchered that chicken in the first scene let me know he had some major culinary chops. He carried himself with a quiet confidence that was warm but also stately. I was surprised to see him in the restaurant, and even more surprised when the host sat us 6 feet away from him. My sister, my friend Sean, and my friend Sara giggled at my bashfulness. The waiter dropped a “so I hear someone’s a big Top Chef fan,” and I had to audibly remind myself to play it cool. We ordered (someone questioned what dorado was out loud and I saw Sylva chuckle to himself) and I was sure to include a few dishes that I recognized from the TV show. The family style menu made it super conducive to tasting lots of dishes, which is ya know, exactly how I like to eat.

When our appetizers came out, Sylva delivered them personally, introduced himself, and started to chat with us about the restaurant and (of course) the show. He was just as classy and kind as he looked like he would be on TV, earnestly engaging with us and sharing some insider knowledge. And when I say “insider knowledge,” I mean he SPILLED THE TEA. It was amazing!

He shared some of his favorite housemates, and told me that the cast normally travels while the show airs to have watch parties and dine in each other’s restaurants. He told us that he had been a longtime fan of Sheldon and Brooke, and expressed how cool it was to get to know and learn from both of them. He told us that during the first episode’s sudden death cook-off, everyone was certain Tesar was going home, but once Tesar pulled out the truffles from his bag, they all knew it was over. He was intrigued by our fantasy snake draft, and wanted to know what order everyone was taken–which by the way, Sylva was actually pick #2, right after Sheldon. (I told you guys, those mad butchery skills!). He thought it was hilarious that we named our cat after Katsuji.

One of our appetizers was the curried beef lollipops you might remember from the charity gala fundraiser challenge. On the show, they told viewers that each attendee paid $500 for their ticket, so they would need to make very upscale food to match that. What they didn’t tell you on Bravo was that they gave each chef a budget of $5,000!! Mind boggling, I know. Sylva said because they all had that credit to burn with Whole Foods, he spend his on premium dry-aged ribeyes…that he promptly took back to the Top Chef kitchen and ran through a meat grinder. Tom Collichio came to check on all the contestants, and abruptly halted and questioned Sylva for this offense. I’ve seen Tom pull his Jedi mind tricks and freak chefs out, but Sylva said that Tom seemed much more startled and appalled than he’d ever seen him before. Certain he was going home but too late in the game to change plans, Sylva continued on and made the curry lollipops…and WON that challenge. Super badass!

For my entree, I ordered the fried whole dorado fish with baby vegetables in a mushroom broth, which was another dish that Sylva won in the Edna Lewis challenge. Sara got a burger, Sean got espresso-dusted duck with fois gras, and my sister got a salmon garnished with corn pudding. Sylva brought us some sharable veggie sides and some desserts on the house, and took time to visit with us between each course. Everything was delicious, clean flavors and modern presentations. The restaurant itself was gorgeous and homey, and had an amazing rooftop bar with a retractable roof. Considering it poured buckets that night, I’m sure they were glad that was an option. The restaurant is situated in the Gayborhood, walking distance from the Liberty Bell, tons of historic buildings, adorable old neighborhoods, biergardens, and even the legendary old taverns where Benjamin Franklin and his friends got that crazy idea to overthrow the British government. Should you ever find yourself in Philadelphia, I highly recommend you pay Maison208 a visit!